| Build-A-Board: The Next Generation of Onscreen Keyboards; Version 2.20 Release 7; User's Guide | ||
|---|---|---|
| Prev | Chapter 3. Build-A-Board Operation | Next |
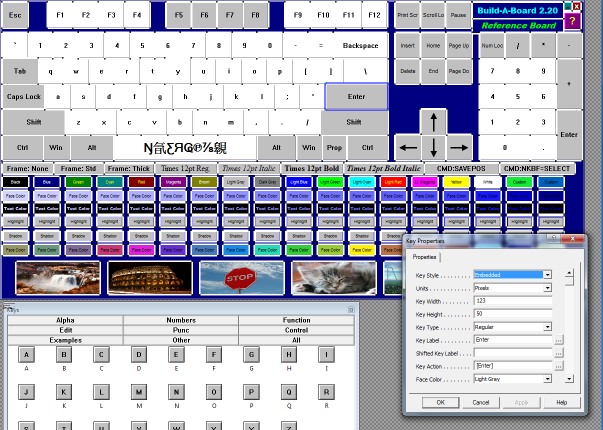
The panel display is the largest portion of the Builder - it may not be removed. A My-T-Soft Panel may contain keys & have certain properties (Frame type, background color, etc.). The Panel Display area contains the Panel being worked on - if the Panel is smaller than the work area, a gray cross-hatched background is displayed.

There are many options for working with the Panel and Keys in this main window within the Builder. Most of the detail and reference information is in the next chapter.
Panel
Note: In Versions 2.00, 2.10, 2.20 the Panel displayed in the Build-A-Board IS the My-T-Soft window display. The terms panel and board are interchangeable. The support of multiple windows, and multiple panels per window is managed at a run-time level, and is not handled within the Builder.
To Access Panel Properties (My-T-Soft Run-Time Window Properties) & Global Settings, right-click on the panel (area clear of any keys), then select Properties from the menu. This is also accessible with the F7 key.
You can resize the panel (board) and can either resize the keys with the board, or just resize the board (key size and positions do not change).
Keys in Panel
Key Properties
To Access Key Properties, right-click on the Key face, then select Properties from the menu. You can also double-click on a key to go directly to the Key Properties.
Key Frames
Keys may be either selected, selected as the current selection, or unselected. The Key state is indicated by the Frame around it in the Builder (View menu). When frames are shown, the following indicates the Key state. You may Show/Hide frames with F5 or View Menu | View Frames. When View Frames is selected, you can limit the view to only selected keys by selecting View Menu | View Frames - Selected only.
Frame color - Key state
All White - unselected
Dark borders - selected (but not current selection)
Blue borders - selected as current selection
Key Sizing / Key Moving
Keys can be sized / moved by using the frames (click & drag on frame segments). There are 8 frame segments per framed key, and can be used for left/right/up/down, or diagonals up/left, up/right, down/left, down/right. You can also move selected keys with the cursor keys - Arrows Left/Right/Up/Down. Frame moves are selected by holding the Shift key down while using the Arrow keys.
Key Alignment / Spacing / Center / Match Size
Keys can be Aligned, Spaced, Centered, size-matched via the Layout menu, and there are various keyboard short-cuts (see menu for details), e.g. the Ctrl/Arrow combinations does alignment of keys when there are multiple selections. For example, you can align a row of keys by dragging a selection rectangle around the row (selecting all keys), then using Ctrl-Up arrow to align the top of the keys (always referenced to the current selection (blue border)).
Grid
You can toggle the view of a Grid to help you align keys with the F4 key, or Tools Menu | Grid. When the Grid is shown, keys will snap to grid points (top/left of key when dragging key, or frame segment being moved). You can increase/decrease the Grid size with the Tools Menu | Grid + and Tools Menu | Grid -, or the keyboard shortcuts Shift-F4/Shift-F3. Size ranges from 2 to 20, and current grid point size is shown on the top / left of the grid and the tool bar grid icon.
Keys Window
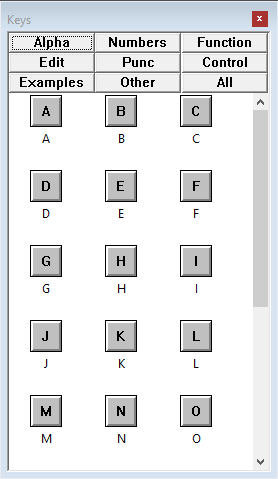
The Keys Window is a quick selection tool to drag and drop keys onto a board - there are various categories (Alpha, Numeric, Edit, All, etc.) You can toggle the view of the Keys window with the F8 key, the View menu | View Keys, or the Tool bar.

Technical Note: The Keys window is managed by the KEYS.INI file in the BIN folder - the actual Keys shown, and the default labels and actions are contained within this file, and is relatively easy to modify for the technically minded - syntax notes and details are listed as comments in the file itself. Note that the 9 sections are fixed within the code itself, so the sections themselves cannot be added or subtracted.
Key Images Window
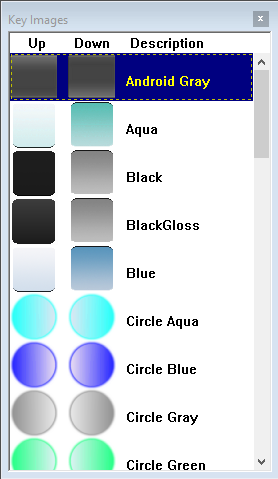
The Key Images Window is a quick selection tool to select key images for a key (or keys) - Key Type must be HiRes, and have the Frame Type set as Key Images. All keys on the open project that have these attributes will be affected by the selected Key Image (there is only 1 Key Image per board). You can select the current Key Image by highlighting and pressing Enter, or double-clicking on the desired key image.
Note: For Android targets, the actual image selected here will not be carried through to the run-time device, but only if Key Images are enabled in Build-A-Board will the option of selecting from the available Key Images in settings operate.

Keyboard Layout Window
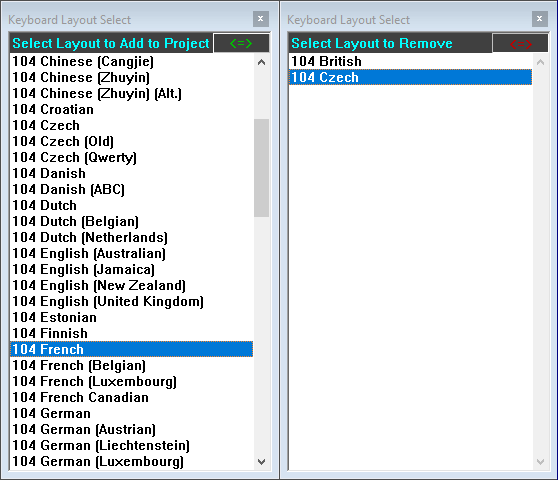
The Keyboard Layout Window shows Version 1.xx KMF layout files that contain different labels / actions from the older 1.xx software. The Keyboard Macro Files are essentially lookup tables that can be referenced when the correct reference option is put into the Key Label and Key Action key properties. As an example, look at the MTSBASIC layouts, e.g. MTSBASIC_0800_AO_BASE. If you look at the A key, you will see it shows the Key Label as {KMF:41}, the Shifted Key Label is {KMF:Shift-41}, and the Key Action is [KMF:41]. These overrides look at the current selected KMF to display the Key Labels, and perform the Key Action. The key Change Language uses the [CMD:NEXTKMF] to scroll through the available KMF files (as selected in the Keyboard Layout Window). To remove layouts, click on the <=> to toggle between available layouts and current layouts - select from available layouts to add, select from current layouts to remove. To see Key number reference for the KMF files, refer to the Build-A-Macro Notes in Advanced User Notes.

As seen in ...
